Wednesday, September 18, 2013

Blueberry Buttermilk Breakfast Muffins

I have been pretty busy for this last week, I am in the process of making my husbands halloween costume and it is coming along great! I know, I am starting really early but I am just really excited! I love halloween! It is my favorite holiday, I love dressing up, I love all the sweets (thus my baking blog), I love all of the scary stuff!

I am going to start doing some halloween baking tutorials soon, so stay tuned!

But for now, here is a delicious blueberry buttermilk breakfast muffin!

Blueberry Buttermilk Breakfast Muffin
Adapted from Alexandra Cooks
Yield about 8 Muffins or 1 (9") Square Pan

1/2 Cup    Butter, room temp
Zest from 1 Large Lemon
3/4 Cup + 2 Tbsp    Sugar
1    Egg
1 Tsp    Vanilla
2 Cups    Flour (keep 1/4 cup out to mix with the blueberries)
2 Tsp    Baking Powder
1 Tsp    Salt (omit if using salted butter)
2 Cups    Blueberries
1/2 Cup    Buttermilk


Mix together the butter, lemon zest, and sugar.


(doesn't this look yummy?!)


Add the vanilla and egg, mix until combined.


Toss the blueberries with 1/4 cup of flour.


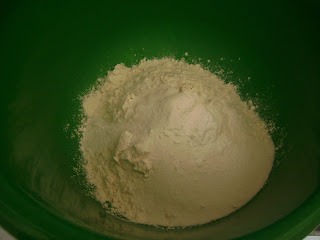
With just a spatula, mix in the flour, baking powder, and salt (if using), and the buttermilk.

*I messed up at this point, the original recipe says to mix in the dry mix (flour, salt, baking powder) and the buttermilk alternating, I did not do this and mine came out perfectly fine, just a little bit small, because I under filled my liners. You can try either way.


Mix gently, so you don't crush the blueberries.


Fill the liners with the batter, the batter is not runny, it is a thicker batter. Sprinkle a little bit of sugar on each one.

Now I filled 12, but as you can see below they turned out small, I think that if you do 8, they will be nice and big.

Bake at 350F for about 15-20 min, toothpick inserted into center should come out clean. 


Enjoy!

Monday, September 9, 2013

No Yeast Buttermilk Cinnamon Rolls

Ok, I think I have said this before, but I think this needs repeating. I love love love cinnamon rolls!!! I could probably eat them all day everyday, but I don't. Sadly. Ha Ha. Needless to say I will probably be doing more than a few tutorials for different types of cinnamon rolls on P.S. Pastries.

Here is the latest one that I found (on Pinterest) (P.S. if you want to follow me on Pinterest click this link to my profile!) This recipe is an easy no yeast, buttermilk cinnamon roll. Yummy!

No Yeast Buttermilk Cinnamon Rolls
(Adapted from Bakingdom)

Yield 8 Rolls

For the dough:
2 1/2 Cups    AP Flour
3 Tbsp.    Sugar
1 Tsp.    Baking Powder
1/2 Tsp.    Baking Soda
1/2 Tsp.    Salt (omit if using salted butter)
1 1/4 Cups    Buttermilk
4 Tbsp.    Butter (melted and divided into 2)

For the Filling:
Brown Sugar
Cinnamon
Melted Butter


Place the flour, sugar, baking powder, baking soda, and salt (if used) into a medium bowl.


Add 2 Tbsp. melted butter, and the buttermilk. 


Mix just until combined.


Place onto a floured surface and knead until pretty smooth. The dough will be soft and a little bit sticky still.


Roll out to about 12"x8". Use flour if it is too sticky, but do not over flour dough. Spread melted butter over the dough. I did not measure this amount, you just need to coat the dough.


Place brown sugar and cinnamon on the dough. This I did not measure either, but you can start at 1/2 cup packed brown sugar, if you like a lot of filling just use more brown sugar. I just use enough cinnamon to make a thin coat over the brown sugar.


Roll into a log. Be careful the dough will stick. Just roll gently and take your time. Cut into 8 rolls. Place into a 8" cake pan that has been brushed with melted butter.


Use the remaining 2 Tbsp. of melted butter (from the dough) and brush over the tops of the rolls.


Place into an oven at 425F. Bake for about 20 mins. Until golden brown, they will look like the picture above. 

Top with a glaze or frosting of your choice. I usually use a powdered sugar and water glaze 2 1/2 cups powdered sugar and 3-4 Tbsp water, mix together until smooth. You can replace the water with pretty much any type of juice or extract. (I have used maple extract, lemon juice, and orange juice (fresh from the orange))


Enjoy!

Wednesday, September 4, 2013

Crispy Chocolate Chip Cookies

I hope everyone had a great weekend! I made a tres leches cake for my mom's birthday and had a huge BBQ for labor day, it was great!

So, onwards! When I am making cookies I like for them to be gooey, soft, and buttery! Mmm...Delicious. But, there are others...(like my husband)...that like crunchy cookies! So I went hunting for a crispy cookie recipe that would do the trick.

Crispy Chocolate Chip Cookies
adapted from The Curvy Carrot

Yield:About 30 Cookies

1 1/2 Cups    AP Flour
3/4 Tsp.    Baking Soda
1/4 Tsp.    Salt (Omit if using salted butter)
1 Stick    Melted Butter
1/2 Cup    Sugar
1/3 Cup    Brown Sugar
2 Tbsp.    Light Corn Syrup
1 Large    Egg Yolk
2 Tbsp.    Milk
1 Tbsp.    Vanilla
Chocolate Chips (any kind will work)/ Peanut butter chips/ Mint chips/ Cinnamon chips


In a mixer bowl, mix together the melted butter, sugar, brown sugar, and corn syrup on medium speed until combined with the paddle attachment.


Add the egg yolk, milk, and the vanilla (I use vanilla paste for everything so that is why it looks really thick) mix until combined.


Add the flour, baking soda, and the salt (if used), mix just until combined.


Now, I split mine into two batches, I mixed this one with mint chips.


And this one with regular chocolate chips.


Scoop them out in whatever size you want. If you want consistent cookies I would use a cookie scoop. Place about 2 inches apart on cookie sheet.

Bake at 375F For 12 mins. Rotate halfway through. Cool on wire rack.


Enjoy!